
In order to create a custom kernel configuration file and build a custom kernel, the full Linux kernel source tree must first be downloaded and installed. The latest Linux kernel stable version is 4.2. In this tutorial, you will learn how to compile the Linux kernel version 4.2 on a Debian and Ubuntu Linux operating system and build .deb file.
Why build a custom kernel?
Compiling a custom Linux kernel has its own advantages and disadvantages. In order to change the kernel's behavior, one had to compile and then reboot into a new Linux. Most of the the functionality in the Linux kernel is contained in modules which can be dynamically loaded and unloaded from the kernel as necessary. Some benefits of a custom Linux kernel:
- Support a wide range of hardware including the latest hardware.
- Remove unwanted drivers from the kernel.
- Faster boot time due to small kernel size.
- Increased security due to disabled unneeded modules.
- Learning about the kernel and advanced usage.
- Always run the cutting edge latest kernel.
- Lower memory usage.
Prerequisites
You need to install the following packages on a Debian or Ubuntu Linux to compiler the Linux kernel:
- git : Fast, scalable, distributed revision control system. You can grab the latest source code using the git command.
- fakeroot : Tool for simulating superuser privileges. Useful to build .deb files.
- build-essential : Tools for building the Linux kernel such as GCC compiler and related tools on a Debian or Ubuntu Linux based system.
- ncurses-dev : Developer's libraries for ncurses. This is used by menuconfig while configuring the kernel options.
- kernel-package : Utility for building Linux kernel related Debian packages.
- xz-utils : XZ-format compression utilities to decompress the Linux kernel tar ball.
- Disk space : 10 GB or more free disk space.
- Time : Kernel compilation may take quite a while, depending on the power of your machine.
Install required packages
Open the terminal application. Type the following apt-get command to install the required packages for building the Linux kernel:$ sudo apt-get install git fakeroot build-essential ncurses-dev xz-utils
Sample outputs:
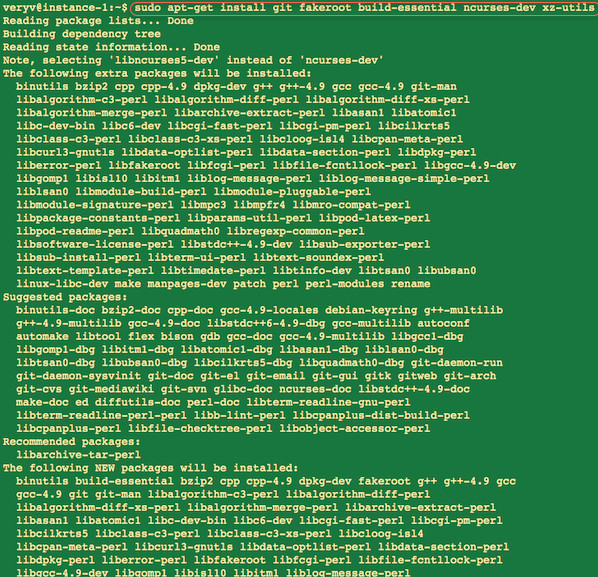
Fig.01: Install gcc and friends
Finally, install the kernel-package package too:$ sudo apt-get install kernel-package
OR$ sudo apt-get --no-install-recommends install kernel-package
Sample outputs:
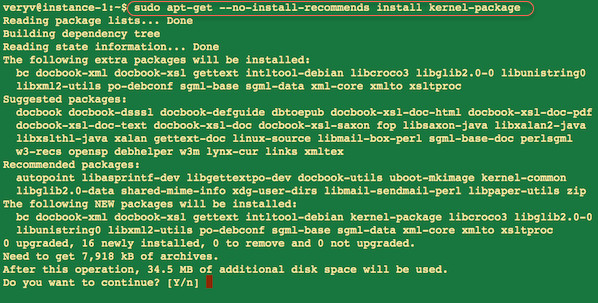
Fig.02: Install utility for building Linux kernel
Download the Linux kernel source code
Type the following wget command:$ https://cdn.kernel.org/pub/linux/kernel/v4.x/linux-4.2.5.tar.xz
Sample outputs:
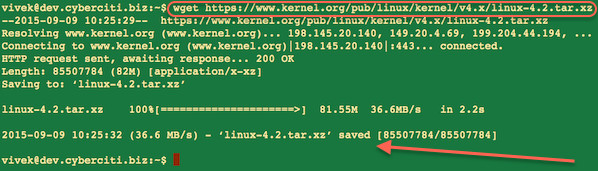
Fig.03: Use the wget to grab the latest source code from kernel.org
Untar the Linux kernel tar ball using the tar command enter:$ tar xvf linux-4.2.5.tar.xz
$ ls
$ cd linux-4.2.5
$ ls
Sample outputs
linux-4.2/
linux-4.2.5/.get_maintainer.ignore
linux-4.2.5/.gitignore
linux-4.2.5/.mailmap
linux-4.2.5/COPYING
linux-4.2.5/CREDITS
linux-4.2.5/Documentation/
linux-4.2.5/Documentation/00-INDEX
linux-4.2.5/Documentation/ABI/
linux-4.2.5/Documentation/ABI/README
linux-4.2.5/Documentation/ABI/obsolete/
linux-4.2.5/Documentation/ABI/obsolete/proc-sys-vm-nr_pdflush_threads
.....
..
....
linux-4.2.5/virt/kvm/async_pf.c
linux-4.2.5/virt/kvm/async_pf.h
linux-4.2.5/virt/kvm/coalesced_mmio.c
linux-4.2.5/virt/kvm/coalesced_mmio.h
linux-4.2.5/virt/kvm/eventfd.c
linux-4.2.5/virt/kvm/irqchip.c
linux-4.2.5/virt/kvm/kvm_main.c
linux-4.2.5/virt/kvm/vfio.c
linux-4.2.5/virt/kvm/vfio.h

linux-4.2.5  linux-4.2.5.tar.xz

arch     crypto         fs       Kbuild   MAINTAINERS  README          security  virt
block    Documentation  include  Kconfig  Makefile     REPORTING-BUGS  sound
COPYING  drivers        init     kernel   mm           samples         tools
CREDITS  firmware       ipc      lib      net          scripts         usr
Configure the Linux kernel
First, copy your existing Linux kernel config file$ cd linux-4.2.5
$ cp /boot/config-$(uname -r) .config
To configure the kernel, run:$ make menuconfig
Sample outputs:
#gallery-1 {
margin: auto;
}
#gallery-1 .gallery-item {
float: left;
margin-top: 10px;
text-align: center;
width: 50%;
}
#gallery-1 img {
border: 2px solid #cfcfcf;
}
#gallery-1 .gallery-caption {
margin-left: 0;
}
/* see gallery_shortcode() in wp-includes/media.php */
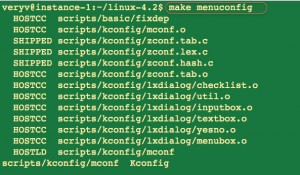
- Fig.04: Starting menuconfig
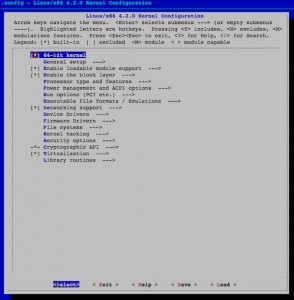
- Fig.05: Select Linux kernel config options and drivers to build
WARNING: It is easy to remove support for a device driver or option and end up with a broken kernel. For example, if the ext4 driver is removed from the kernel configuration file, a system may not boot. When in doubt, just leave support in the kernel.
Make sure you save the changes before exit from menuconfig.
Compile the Linux kernel
You need to clean the source tree and reset the kernel-package parameters, type:$ make-kpkg clean
Sample outputs:
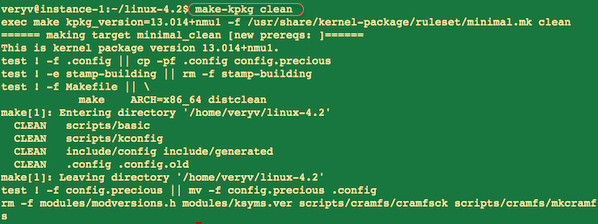
Fig.06: Run make-kpkg command
Now, you can compile the kernel, run:$ fakeroot make-kpkg --initrd --revision=1.0.NAS kernel_image kernel_headers
Sample outputs:
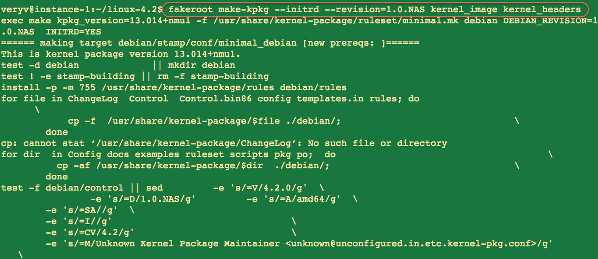
Fig.07: Start compiling the kernel
The fakeroot runs a command called make-kpkg in an environment wherein it appears to have root privileges for file manipulation. This is useful for allowing users to create archives (tar, ar, .deb etc.) with files in them with root permissions/ownership. The make-kpkg command build Debian/Ubuntu kernel packages from Linux kernel sources and options are:
- --initrd : Create an initrd image.
- --revision=1.0.NAS : Set custom revision for your kernel such as 1.0.NAS or -1.0-custom-kernel etc.
- kernel_image : This target produces a Debian package of the Linux kernel source image, and any modules configured in the kernel configuration file .config.
- kernel_headers : This target produces a Debian package of the Linux kernel header image.
Please note that kernel compilation may take quite a while, depending on the power of your machine. On my shared 4 CORE CPU and 4GB ram it took 60 mins to build the Linux kernel. In the end you should see something as follows on screen:
$ ls  ../*.deb
../linux-headers-4.2.5_1.0.NAS_amd64.deb  ../linux-image-4.2.5_1.0.NAS_amd64.deb
Installing a custom kernel
Type the following dpkg command to install a custom kernel on your system:$ sudo dpkg -i linux-headers-4.2.5_1.0.NAS_amd64.deb
$ sudo dpkg -i linux-image-4.2.5_1.0.NAS_amd64.deb
Sample outputs:
Selecting previously unselected package linux-image-4.2.5.
(Reading database ... 154262 files and directories currently installed.)
Preparing to unpack linux-image-4.2.5_1.0.NAS_amd64.deb ...
Examining /etc/kernel/preinst.d/
Done.
Unpacking linux-image-4.2.5 (1.0.NAS) ...
Setting up linux-image-4.2.5 (1.0.NAS) ...

 Hmm. There is a symbolic link /lib/modules/4.2.5/build
 However, I can not read it: No such file or directory
 Therefore, I am deleting /lib/modules/4.2.5/build


 Hmm. The package shipped with a symbolic link /lib/modules/4.2.0/source
 However, I can not read the target: No such file or directory
 Therefore, I am deleting /lib/modules/4.2.5/source

Running depmod.
Examining /etc/kernel/postinst.d.
run-parts: executing /etc/kernel/postinst.d/apt-auto-removal 4.2.5 /boot/vmlinuz-4.2.5
run-parts: executing /etc/kernel/postinst.d/dkms 4.2.5 /boot/vmlinuz-4.2.5
run-parts: executing /etc/kernel/postinst.d/initramfs-tools 4.2.5 /boot/vmlinuz-4.2.5
update-initramfs: Generating /boot/initrd.img-4.2.5
run-parts: executing /etc/kernel/postinst.d/zz-update-grub 4.2.5 /boot/vmlinuz-4.2.5
Generating grub configuration file ...
Found linux image: /boot/vmlinuz-4.2.5-nixcraft-nas.1.0
Found initrd image: /boot/initrd.img-4.2.5-nixcraft-nas.1.0
Found linux image: /boot/vmlinuz-4.2.5
Found initrd image: /boot/initrd.img-4.2.5
Found linux image: /boot/vmlinuz-4.1.6
Found initrd image: /boot/initrd.img-4.1.6
Found linux image: /boot/vmlinuz-3.16.0-4-amd64
Found initrd image: /boot/initrd.img-3.16.0-4-amd64
Found linux image: /boot/vmlinuz-2.6.32-5-amd64
Found initrd image: /boot/initrd.img-2.6.32-5-amd64
done
Reboot the box/server/laptop
Type the following command:$ reboot
OR$ shutdown -r now
Verify that everything is working
Type the following command to verify your new kernel and everything is working fine:$ uname -a
$ uname -r
$ uname -mrs
$ dmesg | more
$ dmesg | egrep -i --color 'error|critical|failed'
Sample outputs:
Linux nas02.nixcraft.net.in 4.2.5 #1 SMP Fri Sep 11 18:31:20 UTC 2015 x86_64 GNU/Linux
And, there you have it, the Linux kernel version 4.2.5 installed and working correctly.
Tips:
apt-cache search linux-image
dpkg –list | grep linux-image
aptitude purge linux-headers-4.1.15 linux-headers-4.3.3