
Hyper-V can be enabled in many ways including using the Windows 10 control panel, PowerShell (my favorite) or using the Deployment Imaging Servicing and Management tool (DISM). This documents walks through each option.
Note: Hyper-V is built into Windows as an optional feature — there is no Hyper-V download.
Check Requirements
- Windows 10 Enterprise, Pro, or Education
- 64-bit Processor with Second Level Address Translation (SLAT).
- CPU support for VM Monitor Mode Extension (VT-c on Intel CPUs).
- Minimum of 4 GB memory.
The Hyper-V role cannot be installed on Windows 10 Home.
Upgrade from Windows 10 Home edition to Windows 10 Pro by opening up Settings > Update and Security > Activation.
For more information and troubleshooting, see Windows 10 Hyper-V System Requirements.
Enable Hyper-V using PowerShell
-
Open a PowerShell console as Administrator.
-
Run the following command:
Enable-WindowsOptionalFeature -Online -FeatureName Microsoft-Hyper-V -All
If the command couldn’t be found, make sure you’re running PowerShell as Administrator.
When the installation has completed, reboot.
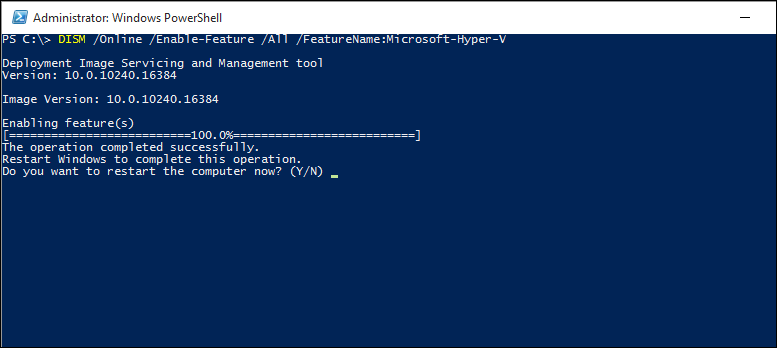
Enable Hyper-V with CMD and DISM
The Deployment Image Servicing and Management tool (DISM) helps configure Windows and Windows images. Among its many applications, DISM can enable Windows features while the operating system is running.
To enable the Hyper-V role using DISM:
-
Open up a PowerShell or CMD session as Administrator.
-
Type the following command:
DISM /Online /Enable-Feature /All /FeatureName:Microsoft-Hyper-V
For more information about DISM, see the DISM Technical Reference.
Enable the Hyper-V role through Settings
-
Right click on the Windows button and select ‘Apps and Features’.
-
Select Programs and Features on the right under related settings.
-
Select Turn Windows Features on or off.
-
Select Hyper-V and click OK.
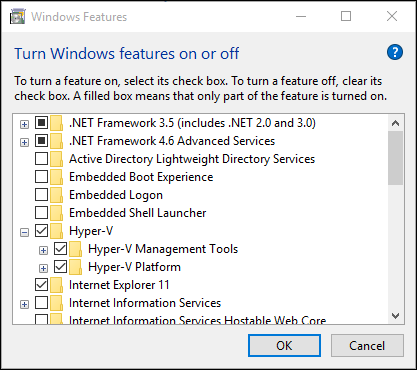
When the installation has completed you are prompted to restart your computer.
Create a Virtual Machine with Hyper-V
Create a virtual machine and install its operating system.
We’ve been building new tools for creating virtual machines so the instructions have changed significantly over the past three releases.
Pick your operating system for the right set of instructions:
- Windows 10 Fall Creators Update and later
- Windows 10 Creators Update
- Windows 10 Anniversary Update and earlier
Let’s get started.
Windows 10 Fall Creators Update
In Fall Creators Update, Quick Create expanded to include a virtual machine gallery that can be launched independently from Hyper-V Manager.
To create a new virtual machine in Fall Creators Update:
-
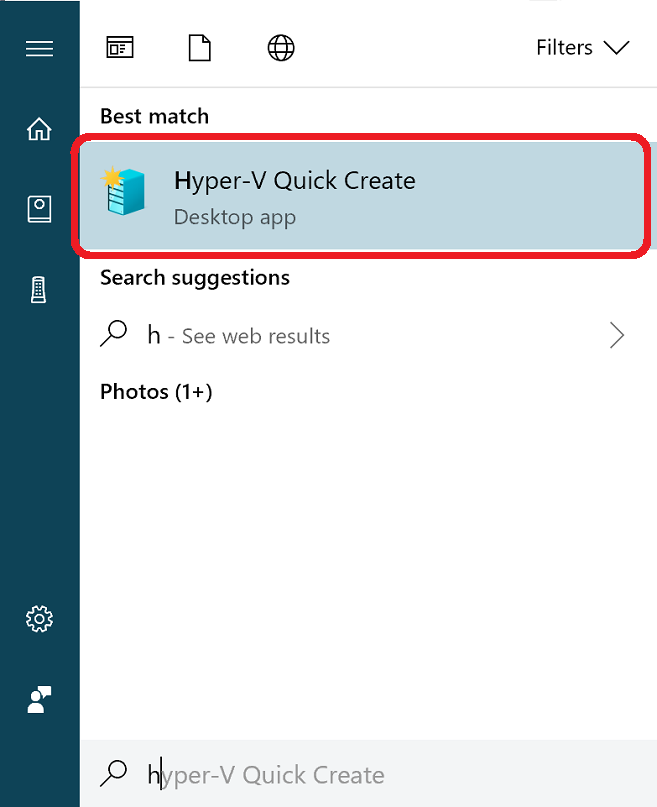
Open Hyper-V Quick Create from the start menu.
-
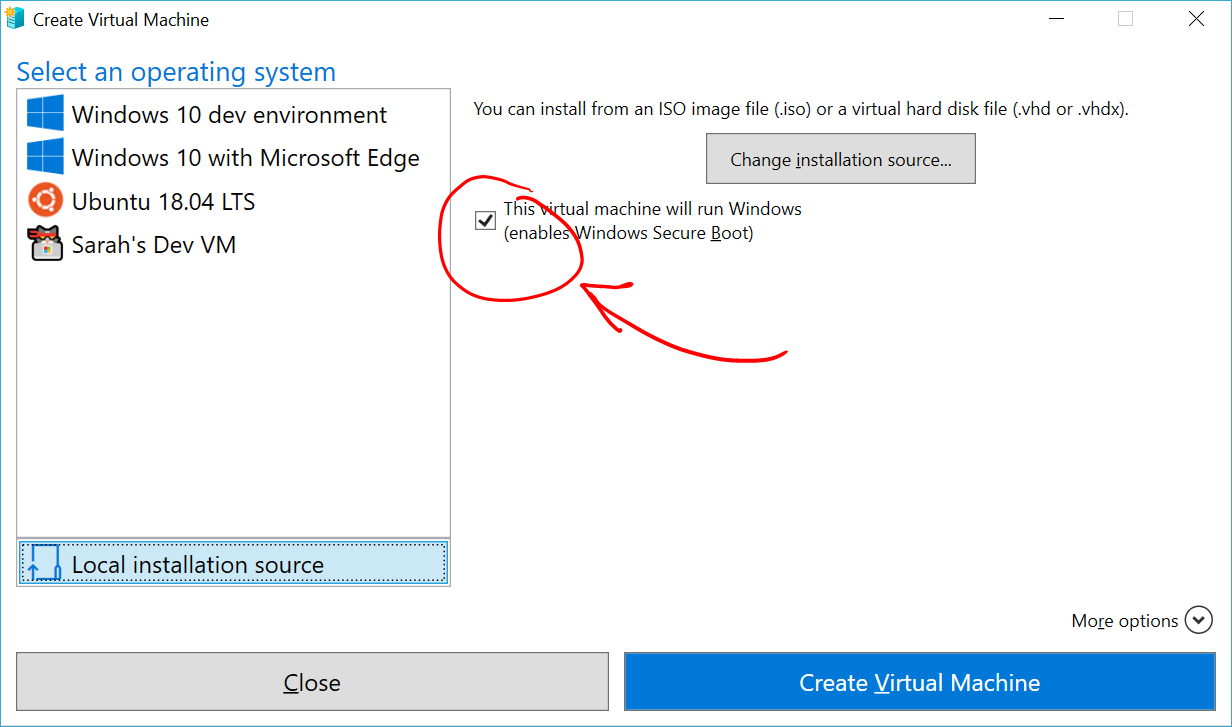
Select an operating system or choose your own by using a local installation source.

- If you want to use your own image to create the virtual machine, select Local Installation Source.
- Select Change Installation Source.
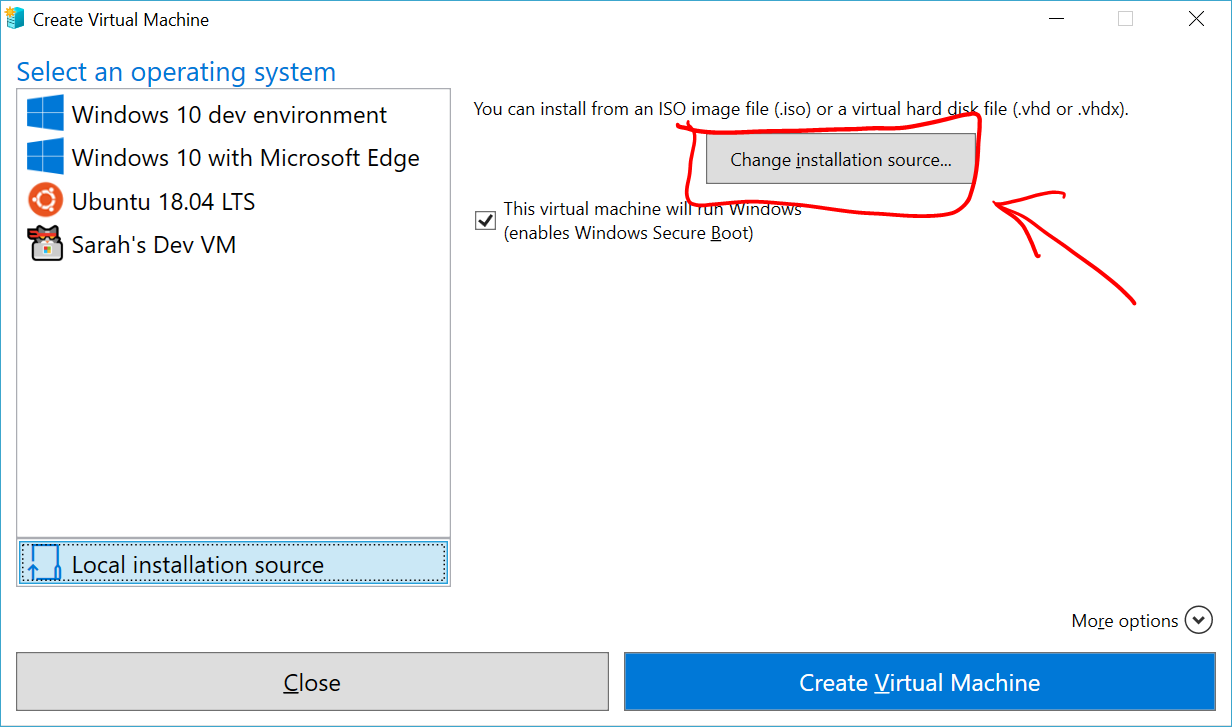
- Pick the .iso or .vhdx that you want to turn into a new virtual machine.
- If the image is a Linux image, deselect the Secure Boot option.
-
Select “Create Virtual Machine”
That’s it! Quick Create will take care of the rest.
Windows 10 Creators Update
-
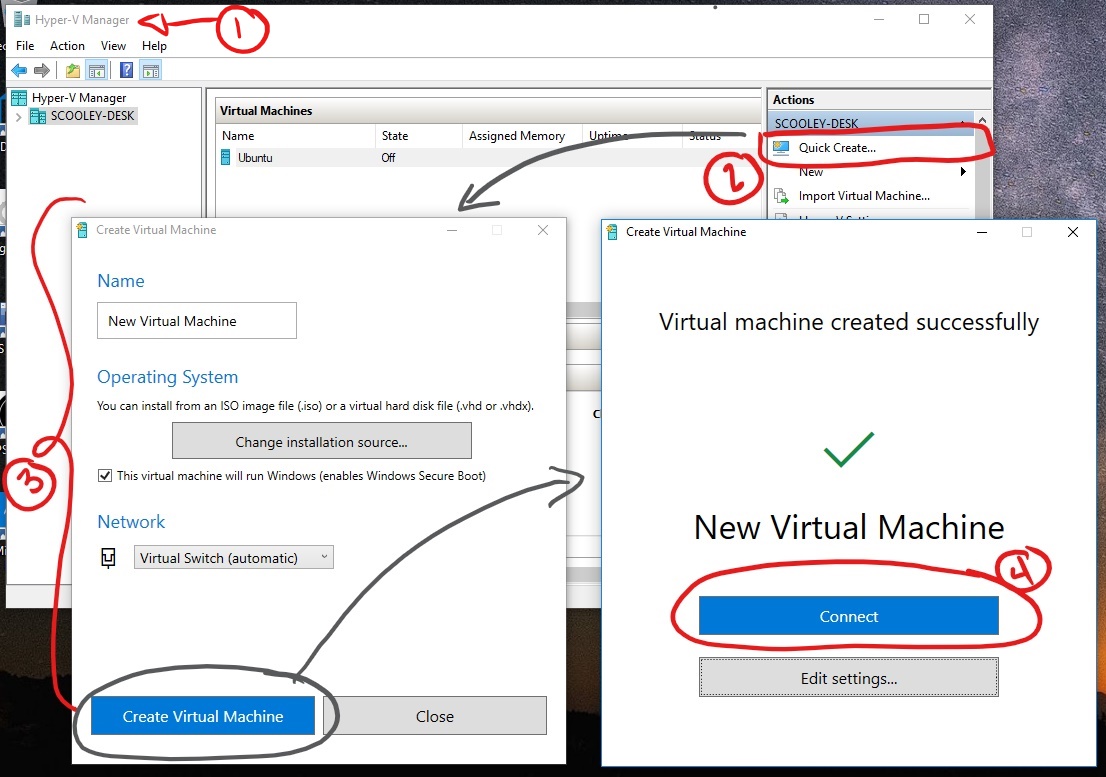
Open Hyper-V Manager from the start menu.
-
In Hyper-V Manager, Find Quick Create in the right hand Actions menu.
-
Customize your virtual machine.
- (optional) Give the virtual machine a name.
- Select the installation media for the virtual machine. You can install from a .iso or .vhdx file. If you are installing Windows in the virtual machine, you can enable Windows Secure Boot. Otherwise leave it unselected.
- Set up network. If you have an existing virtual switch, you can select in the network dropdown. If you have no existing switch, you will see a button to set up an automatic network, which will automatically configure a virtual network.
-
Click Connect to start your virtual machine. Don’t worry about editing the settings, you can go back and change them any time.
You may be prompted to ‘Press any key to boot from CD or DVD’. Go ahead and do so. As far as it knows, you’re installing from a CD.
Congratulations, you have a new virtual machine. Now you’re ready to install the operating system.
Your virtual machine should look something like this:

Note: Unless you’re running a volume-licensed version of Windows, you need a separate license for Windows running inside a virtual machine. The virtual machine’s operating system is independent of the host operating system.
Credits:
https://docs.microsoft.com/en-us/virtualization/hyper-v-on-windows/quick-start/enable-hyper-v
https://docs.microsoft.com/en-us/virtualization/hyper-v-on-windows/quick-start/quick-create-virtual-machine