F.lux – Colour Temperature Adjustment

f.lux makes your computer screen look like the room you're in, all the time. When the sun sets, it makes your computer look like your indoor lights. In the morning, it makes things look like sunlight again.


F.lux on Linux


Download the daemon https://justgetflux.com/linux.html

Then I put it into my PATH:

 /home/<user>/bin/xflux

In order to start it you have to provide your geographical location via command line.
https://justgetflux.com/map.html

If you want it to be started on boot, create a file called xflux.desktop in ~/.config/autostart (I'm using gnome maybe/probably this is different for other desktop environments, not sure though). The content of this file is:

[Desktop Entry]
Encoding=UTF-8
Version=1.0
Name=xflux
Comment=Adapts screen color temperatur according to daytime
Exec=/home/<user>//bin/xflux -l <latitude> -g <longitude>
Terminal=false
Type=Application
Name[en_US]=xflux

If you're living in the US you can also use -z <zipcode> instead of latitude and longitude.

Lisbon
38.7223, -9.1393


Note:

f.lux: what's my lat/long?

https://justgetflux.com/map.html


Compile and Install Linux Kernel v4.2 Source On a Debian / Ubuntu Linux

In order to create a custom kernel configuration file and build a custom kernel, the full Linux kernel source tree must first be downloaded and installed. The latest Linux kernel stable version is 4.2. In this tutorial, you will learn how to compile the Linux kernel version 4.2 on a Debian and Ubuntu Linux operating system and build .deb file.


Why build a custom kernel?

Compiling a custom Linux kernel has its own advantages and disadvantages. In order to change the kernel's behavior, one had to compile and then reboot into a new Linux. Most of the the functionality in the Linux kernel is contained in modules which can be dynamically loaded and unloaded from the kernel as necessary. Some benefits of a custom Linux kernel:

  1. Support a wide range of hardware including the latest hardware.
  2. Remove unwanted drivers from the kernel.
  3. Faster boot time due to small kernel size.
  4. Increased security due to disabled unneeded modules.
  5. Learning about the kernel and advanced usage.
  6. Always run the cutting edge latest kernel.
  7. Lower memory usage.

Prerequisites

You need to install the following packages on a Debian or Ubuntu Linux to compiler the Linux kernel:

  • git : Fast, scalable, distributed revision control system. You can grab the latest source code using the git command.
  • fakeroot : Tool for simulating superuser privileges. Useful to build .deb files.
  • build-essential : Tools for building the Linux kernel such as GCC compiler and related tools on a Debian or Ubuntu Linux based system.
  • ncurses-dev : Developer's libraries for ncurses. This is used by menuconfig while configuring the kernel options.
  • kernel-package : Utility for building Linux kernel related Debian packages.
  • xz-utils : XZ-format compression utilities to decompress the Linux kernel tar ball.
  • Disk space : 10 GB or more free disk space.
  • Time : Kernel compilation may take quite a while, depending on the power of your machine.

Install required packages

Open the terminal application. Type the following apt-get command to install the required packages for building the Linux kernel:
$ sudo apt-get install git fakeroot build-essential ncurses-dev xz-utils
Sample outputs:

Fig.01: Install gcc and friends

Fig.01: Install gcc and friends

Finally, install the kernel-package package too:
$ sudo apt-get install kernel-package
OR
$ sudo apt-get --no-install-recommends install kernel-package
Sample outputs:

Fig.02: Install utility for building Linux kernel

Fig.02: Install utility for building Linux kernel


Download the Linux kernel source code

Type the following wget command:
$ https://cdn.kernel.org/pub/linux/kernel/v4.x/linux-4.2.5.tar.xz
Sample outputs:

Fig.03: Use the wget to grab the latest source code from kernel.org

Fig.03: Use the wget to grab the latest source code from kernel.org

Untar the Linux kernel tar ball using the tar command enter:
$ tar xvf linux-4.2.5.tar.xz
$ ls
$ cd linux-4.2.5
$ ls

Sample outputs


linux-4.2/
linux-4.2.5/.get_maintainer.ignore
linux-4.2.5/.gitignore
linux-4.2.5/.mailmap
linux-4.2.5/COPYING
linux-4.2.5/CREDITS
linux-4.2.5/Documentation/
linux-4.2.5/Documentation/00-INDEX
linux-4.2.5/Documentation/ABI/
linux-4.2.5/Documentation/ABI/README
linux-4.2.5/Documentation/ABI/obsolete/
linux-4.2.5/Documentation/ABI/obsolete/proc-sys-vm-nr_pdflush_threads
.....
..
....
linux-4.2.5/virt/kvm/async_pf.c
linux-4.2.5/virt/kvm/async_pf.h
linux-4.2.5/virt/kvm/coalesced_mmio.c
linux-4.2.5/virt/kvm/coalesced_mmio.h
linux-4.2.5/virt/kvm/eventfd.c
linux-4.2.5/virt/kvm/irqchip.c
linux-4.2.5/virt/kvm/kvm_main.c
linux-4.2.5/virt/kvm/vfio.c
linux-4.2.5/virt/kvm/vfio.h

linux-4.2.5  linux-4.2.5.tar.xz

arch     crypto         fs       Kbuild   MAINTAINERS  README          security  virt
block    Documentation  include  Kconfig  Makefile     REPORTING-BUGS  sound
COPYING  drivers        init     kernel   mm           samples         tools
CREDITS  firmware       ipc      lib      net          scripts         usr

Configure the Linux kernel

First, copy your existing Linux kernel config file
$ cd linux-4.2.5
$ cp /boot/config-$(uname -r) .config

To configure the kernel, run:
$ make menuconfig
Sample outputs:

#gallery-1 {
margin: auto;
}
#gallery-1 .gallery-item {
float: left;
margin-top: 10px;
text-align: center;
width: 50%;
}
#gallery-1 img {
border: 2px solid #cfcfcf;
}
#gallery-1 .gallery-caption {
margin-left: 0;
}
/* see gallery_shortcode() in wp-includes/media.php */


WARNING: It is easy to remove support for a device driver or option and end up with a broken kernel. For example, if the ext4 driver is removed from the kernel configuration file, a system may not boot. When in doubt, just leave support in the kernel.

Make sure you save the changes before exit from menuconfig.

Compile the Linux kernel

You need to clean the source tree and reset the kernel-package parameters, type:
$ make-kpkg clean
Sample outputs:

Fig.06: Run make-kpkg command

Fig.06: Run make-kpkg command

Now, you can compile the kernel, run:
$ fakeroot make-kpkg --initrd --revision=1.0.NAS kernel_image kernel_headers
Sample outputs:

Fig.07: Start compiling the kernel

Fig.07: Start compiling the kernel

The fakeroot runs a command called make-kpkg in an environment wherein it appears to have root privileges for file manipulation. This is useful for allowing users to create archives (tar, ar, .deb etc.) with files in them with root permissions/ownership. The make-kpkg command build Debian/Ubuntu kernel packages from Linux kernel sources and options are:


  • --initrd : Create an initrd image.
  • --revision=1.0.NAS : Set custom revision for your kernel such as 1.0.NAS or -1.0-custom-kernel etc.
  • kernel_image : This target produces a Debian package of the Linux kernel source image, and any modules configured in the kernel configuration file .config.
  • kernel_headers : This target produces a Debian package of the Linux kernel header image.

Please note that kernel compilation may take quite a while, depending on the power of your machine. On my shared 4 CORE CPU and 4GB ram it took 60 mins to build the Linux kernel. In the end you should see something as follows on screen:

$ ls  ../*.deb
../linux-headers-4.2.5_1.0.NAS_amd64.deb  ../linux-image-4.2.5_1.0.NAS_amd64.deb

Installing a custom kernel

Type the following dpkg command to install a custom kernel on your system:
$ sudo dpkg -i linux-headers-4.2.5_1.0.NAS_amd64.deb
$ sudo dpkg -i linux-image-4.2.5_1.0.NAS_amd64.deb

Sample outputs:

Selecting previously unselected package linux-image-4.2.5.
(Reading database ... 154262 files and directories currently installed.)
Preparing to unpack linux-image-4.2.5_1.0.NAS_amd64.deb ...
Examining /etc/kernel/preinst.d/
Done.
Unpacking linux-image-4.2.5 (1.0.NAS) ...
Setting up linux-image-4.2.5 (1.0.NAS) ...
 
 Hmm. There is a symbolic link /lib/modules/4.2.5/build
 However, I can not read it: No such file or directory
 Therefore, I am deleting /lib/modules/4.2.5/build
 
 
 Hmm. The package shipped with a symbolic link /lib/modules/4.2.0/source
 However, I can not read the target: No such file or directory
 Therefore, I am deleting /lib/modules/4.2.5/source
 
Running depmod.
Examining /etc/kernel/postinst.d.
run-parts: executing /etc/kernel/postinst.d/apt-auto-removal 4.2.5 /boot/vmlinuz-4.2.5
run-parts: executing /etc/kernel/postinst.d/dkms 4.2.5 /boot/vmlinuz-4.2.5
run-parts: executing /etc/kernel/postinst.d/initramfs-tools 4.2.5 /boot/vmlinuz-4.2.5
update-initramfs: Generating /boot/initrd.img-4.2.5
run-parts: executing /etc/kernel/postinst.d/zz-update-grub 4.2.5 /boot/vmlinuz-4.2.5
Generating grub configuration file ...
Found linux image: /boot/vmlinuz-4.2.5-nixcraft-nas.1.0
Found initrd image: /boot/initrd.img-4.2.5-nixcraft-nas.1.0
Found linux image: /boot/vmlinuz-4.2.5
Found initrd image: /boot/initrd.img-4.2.5
Found linux image: /boot/vmlinuz-4.1.6
Found initrd image: /boot/initrd.img-4.1.6
Found linux image: /boot/vmlinuz-3.16.0-4-amd64
Found initrd image: /boot/initrd.img-3.16.0-4-amd64
Found linux image: /boot/vmlinuz-2.6.32-5-amd64
Found initrd image: /boot/initrd.img-2.6.32-5-amd64
done

Reboot the box/server/laptop

Type the following command:
$ reboot
OR
$ shutdown -r now

Verify that everything is working

Type the following command to verify your new kernel and everything is working fine:
$ uname -a
$ uname -r
$ uname -mrs
$ dmesg | more
$ dmesg | egrep -i --color 'error|critical|failed'

Sample outputs:

Linux nas02.nixcraft.net.in 4.2.5 #1 SMP Fri Sep 11 18:31:20 UTC 2015 x86_64 GNU/Linux

And, there you have it, the Linux kernel version 4.2.5 installed and working correctly.

Tips:

apt-cache search  linux-image

dpkg –list | grep linux-image

aptitude purge linux-headers-4.1.15 linux-headers-4.3.3


Credits

Using zypper to determine what package contains a certain file (include zypper cheat file)

Lets
say that you are trying to run a piece of software but it comes up with
an error like:
Code:

# error while loading shared libraries: 
libpng12.so.0: cannot open shared object file: No such file or 
directory

You can use zypper to determine what package that library
belongs to by using 'zypper wp':
Code:

# zypper wp 
libpng12.so.0
Loading repository data...
Reading installed packages...
S | Name             | Type    | Version    | Arch   | Repository       
--+------------------+---------+------------+--------+------------------
 | libpng12-0       | package | 1.2.44-2.1 | x86_64 | openSUSE-11.3-Oss
 | libpng12-0       | package | 1.2.44-2.1 | i586   | openSUSE-11.3-Oss
 | libpng12-0-32bit | package | 1.2.44-2.1 | x86_64 | 
openSUSE-11.3-Oss


Code:

# zypper in 
libpng12-0

Then that application should run fine.

Credits

EL5, EL6, EL7 kernel-ml kernel-lt

We provide these kernels for hardware testing in an effort to identify new/updated drivers which can then be targeted for backporting as kmod packages.
Meanwhile, these kernels may provide interim relief to people with non-functional hardware.
We stress that we consider such kernels as a last resort for those who are unable to get their hardware working using the RHEL-7 kernel with supplementary kmod packages.
 
These packages are provided "As-Is" with no implied warranty or support.
Using the kernel-ml may expose your system to security, performance and/or data corruption issues. Since timely updates may not be available from the ELRepo Project, the end user has the ultimate responsibility for deciding whether to continue using the kernel-ml packages in regular service.
 
The packages are intentionally named kernel-ml so as not to conflict with the RHEL-7 kernels and, as such, they may be installed and updated alongside the regular kernel. The kernel configuration is based upon a default RHEL-7 configuration with added functionality enabled as appropriate.
 
If a bug is found when using these kernels, the end user is encouraged to report it upstream to the Linux Kernel Bug Tracker [1] and, for our reference, to the ELRepo bug tracker [2]. By taking such action, the reporter will be assisting the kernel developers, Red Hat and the Open Source Community as a whole.
 
Thank you,
 
The ELRepo Team.
 
[+ info]
 
The kernel-lt packages are built from the sources available from The Linux Kernel Archives, just like the kernel-ml packages. The difference is that kernel-lt is based on a long term support branch and kernel-ml is based on the mainline stable branch.


Credits: http://blog.gmane.org/gmane.linux.rpm.elrepo.user

Which *buntu?

Introduction
Should I use Ubuntu, Kubuntu, Xubuntu, Lubuntu, or Edubuntu? Ubuntu Server Edition? What's the difference?
12.10? 12.04? 11.10? 10.04? What is all this?
Desktop CD, Alternate CD, or Server CD?

Introduction

Before some people can even begin using Ubuntu, they want to sort out which version to use. This page can help you sort it all out.

If reading this page confuses you, however, just go with Ubuntu, the latest LTS version, the Desktop CD. You don't have to worry about these other options unless you're really curious.

Should I use Ubuntu, Kubuntu, Xubuntu, Lubuntu, or Edubuntu? Ubuntu Server Edition? What's the difference?

Ubuntu, Kubuntu, Xubuntu, Lubuntu, and Edubuntu are all the same Linux distro using the same base, the same software repositories, and the same release cycle. They just have different artwork, different user interfaces (in most cases), and different default programs installed.

Ubuntu uses a user interface (or desktop environment) called Gnome. Gnome is focused on simplicity and usability. Ubuntu includes a bunch of Gnome-native applications such as Rhythmbox (music player), and Gedit (text editor). You can find the full list of software packages in ubuntu-desktop here.

Kubuntu uses the K Desktop Environment (also known as KDE). KDE is focused on including a lot of point-and-click configuration options immediately available to end users. Kubuntu includes a bunch of KDE-native applications such as Amarok (music player), K3B (CD burning), and rekonq (web browser). You can find the full list of software packages in kubuntu-desktop here.

Xubuntu uses the Xfce desktop environment, which is a lighter one than Gnome or KDE. In terms of its design principles, it has a bit of a balance—presenting in some ways more point-and-click configuration options than Gnome but also retaining some of the simplicity of Gnome. Its main appeal is its speed, though, and it's ideal for systems with 256 MB to 512 MB of RAM. Both Ubuntu and Kubuntu can run on 512 MB of RAM, but they're more ideal for 1 GB of RAM or more. Xubuntu includes Thunar (file manager), Thunderbird (email client), and Leafpad (text editor). You can find a full list of software packages in xubuntu-desktop here.

Lubuntu uses the LXDE desktop environment, which is a lighter one than Gnome, KDE, and even Xfce. This is ideal for low-memory systems. Lubuntu can work speedily on even 128 MB of RAM. Lubuntu includes pcmanfm (file manager), Sylpheed (email client), and Leafpad (text editor). You can find a full list of software packages in xubuntu-desktop here.

Edubuntu uses the Gnome desktop environment but has a different set of default applications from Ubuntu. Its focus is on educational tools. It includes Kolourpaint (an easy to use paint program), Atomix (a puzzle game for building molecules out of isolated atoms), and Xaos (a real-time interactive fractal zoomer). You can find a full list of software packages in edubuntu-desktop here.

Ubuntu Server Edition is a command-line interface that is designed for people running Linux servers. It is outside the scope of these tutorials.

Mixing and matching *buntus is possible and often encouraged by the community. If you choose Ubuntu, you are not stuck with Ubuntu. If you choose Kubuntu, you are not stuck with Kubuntu. You can use Gnome-native applications in KDE and vice versa. You can use Gnome- and KDE-native applications in Xfce. You can install education-related programs in any desktop environment. You can install kubuntu-desktop on top of Ubuntu and choose which one you want to log into at the login screen. All versions of Ubuntu (Ubuntu, Kubuntu, Xubuntu, Lubuntu, Edubuntu, etc.) share the same software repositories and available applications. You are not locked into using one version just because it is the first version you installed. From now on, I'll be referring to all or any of the above versions as simply Ubuntu.

12.10? 12.04? 11.10? 10.04? What is all this?

The numbering scheme for releases of Ubuntu sometimes confuses people. It is the year of release followed by the month of release. That's all. You'll also sometimes hear these releases referred to by their nicknames, usually involving alliteration, an adjective, and an animal. I've put the nicknames in parentheses.


For Ubuntu 13.04 and beyond, check the Ubuntu Release page on the Wiki.


  • 12.10: October 2012 (Quantal Quetzal)
  • 12.04: April 2012 (Precise Pangolin) Long-Term Support
  • 11.10: October 2011 (Oneiric Ocelot)
  • 11.04: April 2011 (Natty Narwhal) [No longer supported]
  • 10.10: October 2010 (Maverick Meerkat) [No longer supported]
  • 10.04: April 2010 (Lucid Lynx) Long-Term Support
  • 9.10: October 2009 (Karmic Koala) [No longer supported]
  • 9.04: April 2009 (Jaunty Jackalope) [No longer supported]
  • 8.10: October 2008 (Intrepid Ibex) [No longer supported]
  • 8.04 LTS: April 2008 (Hardy Heron) [Supported only on servers]
  • 7.10: October 2007 (Gutsy Gibbon) [No longer supported]
  • 7.04: April 2007 (Feisty Fawn) [No longer supported]
  • 6.10: October 2006 (Edgy Eft) [No longer supported]
  • 6.06 LTS: June 2006 (Dapper Drake) [No longer supported]
  • 5.10: October 2005 (Breezy Badger) [No longer supported]
  • 5.04: April 2005 (Hoary Hedgehog) [No longer supported]
  • 4.10: October 2004 (Warty Warthog) [No longer supported]

While the LTSes (Long Term Support releases) are not necessarily stabler than other releases, they get support for more years (LTS releases get three years of security updates or five years for servers instead of just eighteen months), and my tutorial screenshots almost always use the latest LTS instead of the latest release.

Releases come out around every six months with the latest (for that time) software available and usually some extra features and possibly some new artwork (splash screens/wallpaper).

Desktop CD, Alternate CD, or Server CD?

The default option for type of CD is the Desktop CD. It is a live CD that is also an installation CD. A live CD allows you (provided you have enough memory—I'd recommend at least 512 MB) to run a fully functional Ubuntu operating system without affecting your hard drive or existing Windows or Mac installation. The live CD runs the session off the CD itself and your computer's RAM. While running the live CD, you can also install Ubuntu to your hard drive (yes, you can browse the web and type up documents while installing Ubuntu)—for the combination of live session and installation, I'd recommend at least 1 GB of RAM. Warning: the Desktop CD cannot be used for upgrading existing Ubuntu installations. It will do only a clean (re)installation of Ubuntu.

If you have a special situation, you may want to use the Alternate CD instead of the Desktop CD. The Alternate CD allows you to install Ubuntu without also running a live session. This is ideal for people with less RAM (128 to 256 MB of RAM). There is an option to install Ubuntu from the Desktop CD directly without a full live session, but it'll still require more RAM than the Alternate CD would. The Alternate CD also allows you to do OEM installations and the installation of only a command-line system. It can also be used for upgrades from older versions to newer versions of Ubuntu—particularly handy for those who have a slower (or no) internet connection, since most upgrades happen with direct downloads from the Ubuntu software repositories instead of from a CD.

Note: the Alternate CD has been discontinued as of Ubuntu 12.10 (Quantal Quetzal).

The Server CD provides you all the tools you need to set up a server (including LAMP). It does not come with a GUI (graphical user interface), but you can add one later if you feel you really need one (most people recommend against using a GUI on a server). If you accidentally downloaded the Server CD and want a home desktop instead of a server, you can install a home desktop by typing

sudo apt-get update
sudo apt-get install ubuntu-desktop
sudo service gdm start

Credits http://www.psychocats.net/ubuntu/whichbuntu (Last updated 12/30/14 01:30)

Install Adobe Reader on Fedora 22/21, CentOS/RHEL 7.1/6.7/5.11

1. Change Root User

2. Get Adobe Reader RPM package

0
1
2
3
4
5

 
## English version ##
wget http://ardownload.adobe.com/pub/adobe/reader/unix/9.x/9.5.5/enu/AdbeRdr9.5.5-1_i486linux_enu.rpm


(adsbygoogle=window.adsbygoogle||[]).push({});

3a. Install Adobe Reader (acroread) on Fedora 22/21/20/19

Note: On x86_64 bit system, 32-bit dependencies is also installed.

0
1
2
3
4
5
6
7
8
9
10
11
12
13
14
15
 
## Fedora 22 ##
## English version ##
dnf install AdbeRdr9.5.5-1_i486linux_enu.rpm
 
## Install other needed packages on Fedora ##
dnf install nspluginwrapper.i686 libcanberra-gtk2.i686 adwaita-gtk2-theme.i686 PackageKit-gtk3-module.i686
 
 
## Fedora 21/20/19/18/17/16/15/14/13/12 ##
## English version ##
yum localinstall AdbeRdr9.5.5-1_i486linux_enu.rpm
 
## Install other needed packages on Fedora ##
yum install nspluginwrapper.i686 libcanberra-gtk2.i686 adwaita-gtk2-theme.i686 PackageKit-gtk3-module.i686


3b. Install Adobe Reader (acroread) on CentOS/Red Hat (RHEL) 7

Note: On x86_64 bit system, 32-bit dependencies is also installed.

0
1
2
3
4
5
6
 
## Install nux-dextop repo ##
yum  localinstall http://li.nux.ro/download/nux/dextop/el7/x86_64/nux-dextop-release-0-5.el7.nux.noarch.rpm
 
## English version ##
yum –enablerepo=nux-dextop localinstall AdbeRdr9.5.5-1_i486linux_enu.rpm


3c. Install Adobe Reader (acroread) on CentOS 6.7 and Red Hat (RHEL) 6.7

Note: On x86_64 bit system, 32-bit dependencies is also installed.

0
1
2
3
4
5
6
 
## English version ##
yum localinstall AdbeRdr9.5.5-1_i486linux_enu.rpm
 
## Install other needed packages on CentOS / Red Hat (RHEL) ##
yum install nspluginwrapper.i686 libcanberra-gtk2.i686 gtk2-engines.i686 PackageKit-gtk-module.i686
 
(adsbygoogle=window.adsbygoogle||[]).push({});
 

3d. Install Adobe Reader (acroread) on CentOS 5.11 and Red Hat (RHEL) 5.11

Note: On x86_64 bit system, 32-bit dependencies is also installed.

0
1
2
3
 
## English version ##
yum localinstall AdobeReader_enu nspluginwrapper.i686


4. Start Adobe Reader (acroread)

Find Adode Reader on “Office Menu”.
Or
Start Adobe Reader with following command.

0
1
2
 
acroread


5. Install Adobe Reader (Acrobat PDF Reader) Browser Plugin

This is not currently working on CentOS 7.

Simplest way is copy nppdf.so to browser plugins directory:

0
1
2
3
4
5
6
 
## 32-bit system ##
cp /opt/Adobe/Reader9/Browser/intellinux/nppdf.so /usr/lib/mozilla/plugins/
 
## 64-bit system ##
cp /opt/Adobe/Reader9/Browser/intellinux/nppdf.so /usr/lib64/mozilla/plugins/


How to install the Java Runtime Environment from Java.com

If a browser plugin and Java runtime are all that is required, as opposed to a full Java development environment, the Oracle (formerly Sun) Java Runtime Environment (JRE) RPMs work for all currently supported CentOS versions, and are arguably the most compatible with web pages that require a Java plugin. The Java versions shown below are current as of this writing. Always use the latest available version for your architecture (i386 32-bit or x86_64/amd64 64-bit) and adjust accordingly.

Java 1.7 and Java 1.8 are now available, while Java 1.6 has been deprecated. However the same procedure as below can be used with any of them. The only difference is that the new versions are distributed directly as a rpm package so instead of the shell command which unpacks and installs the ".bin" package, simply use yum to install the downloaded rpm package, just as you would install any other rpm; for instance: yum install ./jre-8u11-linux-i586.rpm


Java i386 JRE and plugin

Due to the way the libraries bundled in the package were built, the browser plugin included in Java 1.7 >= 1.7.0.65 no longer works on CentOS 5. The package can be sucessfully installed but firefox will not enable the plugin due to missing GLIBC symbols. Please use the plugin from Java 1.8 instead.

Download the latest Linux RPM (self-extracting file), currently jre-6u30-linux-i586-rpm.bin, from java.com then as root install and configure the alternatives system and plugins.


# cd [download directory]
# sh ./jre-6u30-linux-i586-rpm.bin
# alternatives --config java
There are 2 programs which provide 'java'.
  Selection    Command
-----------------------------------------------
*+ 1           /usr/lib/jvm/jre-1.6.0-openjdk/bin/java
   2           /usr/lib/jvm/jre-1.5.0-gcj/bin/java
Enter to keep the current selection[+], or type selection number:

Note number of versions, N, and use N+1 (if there is no output from the previous command, just imagine that N=0) – For example, if 2 versions were installed then:


# alternatives --install /usr/bin/java java /usr/java/latest/bin/java 3
# alternatives --config java
There are 3 programs which provide 'java'.
  Selection    Command
-----------------------------------------------
*+ 1           /usr/lib/jvm/jre-1.6.0-openjdk/bin/java
   2           /usr/lib/jvm/jre-1.5.0-gcj/bin/java
   3           /usr/java/latest/bin/java
Enter to keep the current selection[+], or type selection number: 3
# java -version
java version "1.6.0_30"
Java(TM) SE Runtime Environment (build 1.6.0_30)
Java HotSpot(TM) Client VM (build 20.1-b02, mixed mode, sharing)

Create links in the Mozilla Plugins directory so Java will work in supported browsers such as Firefox.


# cd /usr/lib/mozilla/plugins/
# ln -fs /usr/java/latest/lib/i386/libnpjp2.so

Skip to the section on testing the browser plugin.


Java x86_64 JRE and plugin

Download the latest Linux RPM (self-extracting file), currently jre-6u30-linux-x64-rpm.bin, from java.com then as root install and configure the alternatives system and plugins:


# cd [download directory]
# sh ./jre-6u30-linux-x64-rpm.bin
# alternatives --config java
There are 4 programs which provide 'java'.
  Selection    Command
-----------------------------------------------
   1           /usr/lib/jvm/jre-1.4.2-gcj/bin/java
   2           /usr/java/jre1.6.0_13/bin/java
   3           /usr/java/jre1.6.0_18/bin/java
*+ 4           /usr/lib/jvm/jre-1.6.0-openjdk.x86_64/bin/java
Enter to keep the current selection[+], or type selection number:

Note number of versions, N, and use N+1 (if there is no output from the previous command, just imagine that N=0) – For example, if 4 versions were installed then:


# alternatives --install /usr/bin/java java /usr/java/latest/bin/java 5
# alternatives --config java
There are 5 programs which provide 'java'.
  Selection    Command
-----------------------------------------------
   1           /usr/lib/jvm/jre-1.4.2-gcj/bin/java
   2           /usr/java/jre1.6.0_13/bin/java
   3           /usr/java/jre1.6.0_18/bin/java
*+ 4           /usr/lib/jvm/jre-1.6.0-openjdk.x86_64/bin/java
   5           /usr/java/latest/bin/java
Enter to keep the current selection[+], or type selection number: 5
# java -version
java version "1.6.0_26"
Java(TM) SE Runtime Environment (build 1.6.0_30)
Java HotSpot(TM) 64-Bit Server VM (build 20.1-b02, mixed mode)

Create links in the Mozilla Plugins directory so Java will work in supported browsers such as Firefox.


# cd /usr/lib64/mozilla/plugins/
# ln -fs /usr/java/latest/lib/amd64/libnpjp2.so


Test browser

Exit Firefox if it is running and [re]start Firefox. Type "about:plugins" in the URL field. It should show Java enabled.

Verify installed version at Java.com, Test installed version at Java.com or at javatester.org.


Remove old versions

Oracle recommends removing old Java versions as they represent a security risk if left installed. By default, the installation procedure above will not remove old versions so we must do this manually:


# rpm -qa jre\*
jre-1.6.0_13-fcs.x86_64
jre-1.6.0_18-fcs.x86_64
jre-1.6.0_30-fcs.x86_64
# rpm -e jre-1.6.0_18-fcs.x86_64 jre-1.6.0_13-fcs.x86_64


  • Java is a trademark of the Oracle Corporation.


  • This page created and maintained by PhilSchaffner. Other Wiki contributors are invited to make corrections, additions, or modifications.

HowTos/JavaRuntimeEnvironment (last edited 2014-08-05 13:18:58 by ManuelWolfshant)

How to setup multimedia on CentOS 7

You will need to also install the EPEL repository as nux-dextop depends on this for some of its packages.

Step 1: Install the nux-dextop repository

Run this command to install the nux-dextop repository.

yum -y install http://li.nux.ro/download/nux/dextop/el7/x86_64/nux-dextop-release-0-5.el7.nux.noarch.rpm

Step 2: Install the adobe repository

Run this command to install the adobe repository.

yum -y install http://linuxdownload.adobe.com/linux/x86_64/adobe-release-x86_64-1.0-1.noarch.rpm

Step 3: Install the desired packages

This command will download the flash plugin for Firefox.

yum install flash-plugin

This command will download the java plugin for Firefox.

yum install icedtea-web

This command will install Handbrake, VLC and smplayer.

yum install vlc smplayer ffmpeg HandBrake-{gui,cli}

The following command installs a decoder and codecs which are required to play certain types of media. Their usage may be legally restricted in some areas. Obtain legal advice if you are uncertain about the laws in your locality.

yum install libdvdcss gstreamer{,1}-plugins-ugly gstreamer-plugins-bad-nonfree gstreamer1-plugins-bad-freeworld

Final note

Notice that you have the CentOS, Nux-Dextop and Adobe repos enabled by default and there should be no issues with running "yum update" or "yum upgrade" in the future.

Credits -> TipsAndTricks/MultimediaOnCentOS7 (last edited 2014-10-23 15:25:55 by TrevorHemsley)

How to Choose a Partition Scheme for Your Linux PC

What Are Partitions?

Partitions are divisions in the formatting of the hard disk.  It’s a logical – as opposed to a physical – division, so you can edit and manipulate them for various purposes.  Think breaking a disk into two configuration parts.  Partitions are really handy because they act as a sandbox.  If you have a 1 TB hard drive partitioned into a 250 GB partition and a 750 GB partition, what you have on the latter will not affect the other, and vice versa.  You can share one of those partitions on the network and never worry about people accessing information on the other.  One could have Windows installed, riddled with viruses and trojans.  The other could be running a very obsolete, security-hole addled Linux installation.  Never shall the two interfere, unless either you make them or the hard drive itself physically dies.

The other useful thing is that you can have multiple partitions, each formatted with a different “file system.”  A file system is a formatting of the disk into a table that the operating system can read, interpret, and write to.  Only have one hard drive?  That’s okay, because you can still install multiple operating systems on it without actually having another physical disk.

While there are tons of file system types, there are only three kinds of partitions: primary, extended, and logical.  Any given hard disk can only have a maximum of four primary partitions.  This limitation is due to something called the Master Boot Record which tells the computer which partitions it can boot from, and so primary partitions are usually reserved for operating systems.  But what if we want more than four?  That’s where the extended partition comes into play.  It serves as a hollow container for any number of smaller, logical partitions.  You can make as many as you like there, as well as make it home to your non-OS sections.

If extended partitions are so great, why not just use them?  That’s because you can’t directly boot from anywhere inside an extended partition.  There are ways to get around this, but the best thing to do is to plan properly beforehand with primary partitions.  In addition, the way partitions are numbered by the system depends on these types.  First, the machine will number based on all primary partitions, and then by logical ones.  This can cause changing drive letters if you switch between OSs or add or delete partitions later.

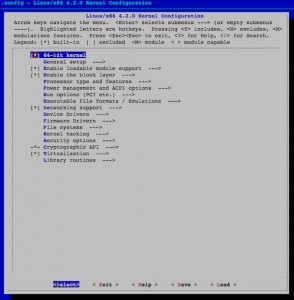
Mount Points in Linux

partition scheme (methoddan)

Image by MethodDan

On Windows, things are pretty clearly cut: it lives on your disk, usually on one partition, and that’s that.  If you have other drives, and they have a compatible file system, then it’ll read them as well.  If not, it’ll usually ignore them, or offer you the ability to reformat.  Linux – and anything resembling Unix, really – doesn’t quite work that way.

The way Linux works is that it puts everything onto a tree.  If you have another partition or disk, it gets “mounted” as a branch in a specific folder, usually /media or /mnt.  The directory that a partition gets mounted to is called a “mount point.”  This method works better with Linux’s tree structure, and you can mount partitions as folders nearly anywhere.  In Windows, this is not so easily done; new partitions generally show up as separate drives.  In addition, Linux can work with many more types of file systems natively than Windows.

Remember how there could only be four primary partitions?  If you want to boot 145 OSs like someone on the JustLinux forums did, you can set up a primary partition for /boot, which houses a boot-loader, like GRUB or LiLo, which handles initial functions and then continues booting into the extended partitions.

What Scheme Should I Use?

The standard partitions scheme for most home Linux installs is as follows:

  • A 12-20 GB partition for the OS, which gets mounted as / (called “root”)
  • A smaller partition used to augment your RAM, mounted and referred to as swap
  • A larger partition for personal use, mounted as /home

The exact size requirements change based on your needs, but in general you start with swap.  If you do a lot of multimedia editing, and/or have a smaller amount of RAM, you should use a larger amount of swap.  If you have plenty of memory, you can skimp on it, although some distributions of Linux have a problem going into standby or hibernating without much swap.  The rule of thumb is that you choose between 1.5 to 2 times the amount of RAM as the swap space, and you put this partition in a place that is quick to reach, like at the beginning or end of the disk.

Even if you install a ton software, a maximum of 20 GB for your root partition should be enough.  Most distributions of Linux use either ext3 or ext4 as their file system nowadays, which has a built-in “self-cleaning” mechanism so you don’t have to defrag.  In order for this to work best, though, there should be free space for between 25-35% of the partition.

Finally, whatever else you have should go to your /home partition.  This is where your personal stuff is stored. It is functionally the equivalent of the “Users” directory in Windows, housing your application settings, music, downloads, documents, etc, and those of any other users you have on your system.  It’s useful to have /home in a separate partition because when you upgrade or reinstall your OS, you don’t have to backup anything in this folder!  Isn’t that convenient?  To top it off, most of your program- and UI-related settings are saved as well!

Screenshot-Install

If you’re running a server with a lot of users and/or a lot of media, you could optimize performance by using two hard drives.  A small solid state drive would be perfect for the OS to live on, maybe 32 GB at most, and you could throw the swap partition on the beginning of a 1 or 2 TB “green” drive that’s mounted on /home.

If you’re into more tinkering, you can even set up different partitions for things like the temporary directory (/tmp), for your web server’s content (/var/www), for programs (/usr), or for log files (/var/log).

Specifying Mount Points During Installation

In our example, we’ll be using showing the partition setup during an Ubuntu Maverick Meerkat installation.  When you get to where it says “Allocate drive space,” choose “Specify partitions manually (advanced).”

installation manual


Don’t panic just because you see “advanced”; it’s really not that difficult and you’ll be getting some real rewards from the process.  Click forward and you’ll see the partition table.

new partition

Click on the free space row in the table and then click on “Add…”  If you don’t have free space, click on your Windows partition, hit “Change…” and shrink it to a more palatable size.  This will give you some free space to work with.

Create partition

Here, you can see that I’ve created a Primary partition of about 11.5-odd GB at the beginning of the disk and I’ve specified it to use root as the mount point.  You will have to use a Linux-compatible file system, so I used the default ext4, although you can use ext2, ext3, ReiserFS, or whatever else.  Do some research online and you’ll be able to choose the best, but if you’re in doubt, stick to the default.  You can adjust yours to more space if you have it, but again, you probably won’t ever need more than 20 GB unless you’re installing/compiling a lot of software.  Click “OK” and you’re set to create another partition.

swap

This time, as you can see, I’ve chosen a logical partition (the partitioning program automatically creates an extended partition for this).  Since this machine has a 512 MB of RAM, I’ve approximated 1.5 times that, and designated it as “swap area.”  Also note that I’ve stuck this at the end of the disk, which will help keep disk seeking times at a minimum.  Click “OK,” and let’s create another partition.

home

I’ve selected all of the rest of the space in the middle to be my /home partition.  The compatible file system I’ve chosen is again ext4.  Now here is the gray area: should it be primary or logical?  I went with primary because I know that I won’t be installing another OS on here, otherwise I would have gone with logical.  If you don’t plan on installing more than three OSs, you can just make it primary for simplicity’s sake.

When you’re all finished, you can resume installation.  Here’s my resulting partition table:

finished!

If you get cold feet, you can quit the installation at this point without fearing any data loss.  Nothing is actually done to your disk until you hit “Install Now,” so you can go back and edit things as you wish.


Now that you know what partitions are and how to optimally set up your Linux installation, feel free to continue your search online.  There’s a lot more to learn!  Have any advice or tricks to the process?  Maybe some useful experiences to share?  Be sure to leave a comment!


Credits